
Setup: Tp-Link Wi-Fi Range Extender TL-WA860RE User Guide
Content
TP-Link Wi-Fi Range Extender TL-WA860RE
Introduction
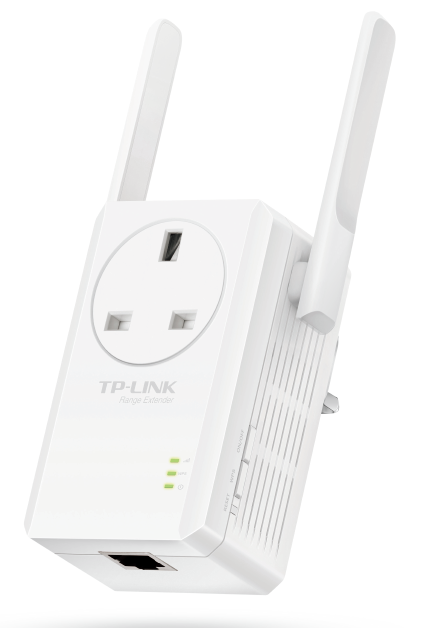
The TP-Link Wi-Fi Range Extender TL-WA860RE is a versatile and powerful device designed to extend the coverage of your existing Wi-Fi network. Launched in 2014, this range extender has been a popular choice for home and small office environments due to its ease of use and effective performance. The TL-WA860RE is estimated to be priced around $25-$35, making it an affordable solution for enhancing your Wi-Fi coverage.
This device is intended to eliminate dead zones and ensure a stable internet connection throughout your home or office. With its compact design and wall-plug format, it can be easily placed in any power outlet, making it a convenient addition to your network setup. The TL-WA860RE supports up to 300 Mbps wireless speed, ensuring that you can enjoy smooth internet browsing, streaming, and online gaming without any interruptions.
Specifications
- Wireless Speed: Up to 300 Mbps
- Wireless Standards: IEEE 802.11n, IEEE 802.11g, IEEE 802.11b
- Frequency: 2.4 GHz
- Number of Antennas: 2 external antennas
- Ethernet Port: 1 x 10/100 Mbps Ethernet Port
- Range Extender Mode: Yes
- Access Point Mode: Yes
- Power Consumption: 6.5W
- Dimensions: 110 x 66 x 75 mm
Conventions
Appearance
Set Up System Time
System time is the time displayed when the extender is running. The system time you configure here will be used for time-based functions like Power Schedule. If you have enabled the Daylight Saving Time feature, the system time will be sychronized with the daylight saving time you configure.
- Visit http://tplinkrepeater.net, and log in with the username and password you set for the extender.
- Go to Settings > System Tools > Time Settings.
To get system time:
Select your local Time Zone from the drop-down list.
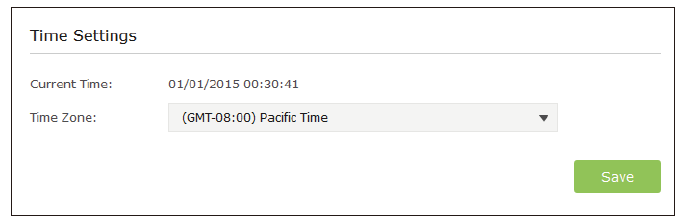
- Click Save.
To set up Daylight Saving Time:
- Select Enable Daylight Saving Time.
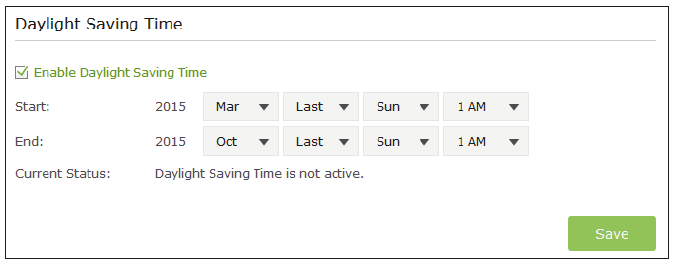
- Select the Start and End date and time of the aylight saving time your local time zone.
- Click Save.
Control LEDs
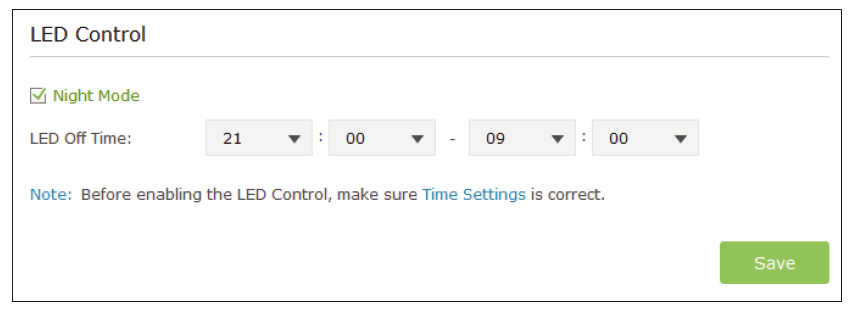
The LEDs of the extender indicate its activities and status. You can enable the Night Mode feature to specify a time period during which the LEDs are off.
- Visit http://tplinkrepeater.net, and log in with the username and password you set for the extender.
- Go to Settings > System Tools > LED Control.
To specify a time period when LEDs are off:
- Select Night Mode.
- Specify a time period in the LED Off Time field , and the LEDs will be off during this period.
- Click Save.
Power Schedule
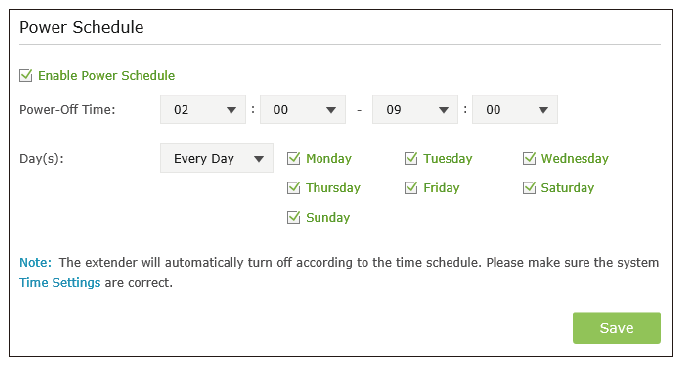
The Power Schdule feature allows you to specify a time period during which the extender is off.
- Visit http://tplinkrepeater.net, and log in with the username and password you set for the extender.
- Go to Settings > Advanced Settings > Power Schedule.
To specify a time period when the extender is off:
- Select Enable Power Schedule.
- Specify a time period in the Power-Off Time field and repetitive days in the Day(s) field, and the extender will be off during this period.
Upgrade the Firmware
TP-LINK is dedicated to improving, richening the product features and giving you a better network experience. You can download the latest firmware file from the Support page of our website www.tp-link.com and upgrade the firmware to the latest version.
Note:
- Make sure the latest firmware file is matched with the hardware version (as shown in the download section of the Support page).
- Make sure that you have a stable connection between the extender and your computer. It is NOT recommended to upgrade the firmware wirelessly.
- Backup your extender configuration.
- Do NOT power off the extender during the firmware upgrade.
To upgrade the firmware:
- Download the latest firmware file for the extender from our website www.tp-link. com.
- Visit http://tplinkrepeater.net, and log in with the username and password you set for the extender.
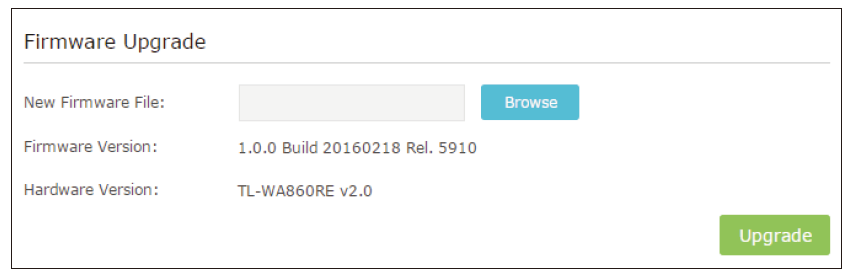
- Go to Settings > System Tools > Firmware Upgrade.
- Click Browse to locate the downloaded new firmware file, and then click Upgrade.
- Wait a few minutes for the upgrade and reboot.
Backup and Restore Configuration Settings
The configuration settings are stored as a configuration file in the extender. You can backup the configuration file and restore the extender to the previous settings from the backup file when needed. Moreover, if necessary, you can erase the current settings and reset the extender to the default factory settings.
- Visit http://tplinkrepeater.net, and log in with the username and password you set for the extender.
- Go to Settings > System Tools > Backup & Restore.
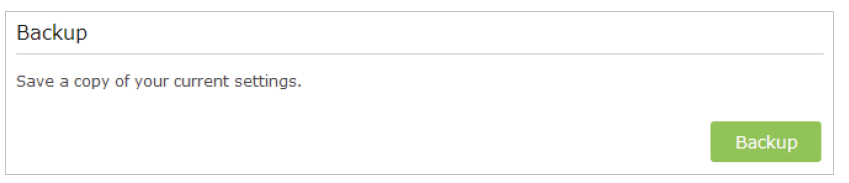
To backup configuration settings:
Click Backup to save a copy of the current settings to your local computer. A ‘.bin’ file of the current settings will be stored on your computer.
To restore configuration settings:
Click Browse to locate the backup configuration file stored on your computer, and click Restore.
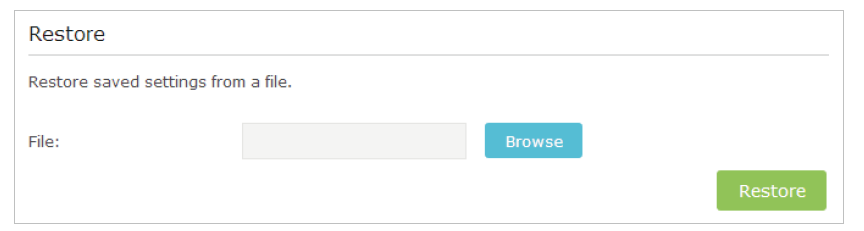
- Wait a few minutes for the restore and reboot.
Note: During the restoring process, do not power off or reset the extender.
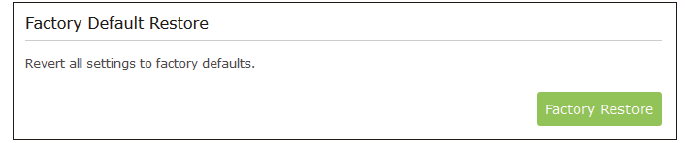
To reset the extender to factory default settings:
- Click Factory Restore to reset the extender.
- Wait a few minutes for the reset and reboot.
Note:
- During the resetting process, do not power off or reset the router.
- We strongly recommend you backup the current configuration settings before resetting the extender.
Wait a few minutes for the reset and reboot.
Note:
- During the resetting process, do not power off or reset the router.
- We strongly recommend you backup the current configuration settings before resetting the extender.
Change Admin Account
The account management feature allows you to change your login username and password of the management webpage.
- Visit http://tplinkrepeater.net, and log in with the username and password you set for the extender.
- Go to Settings > System Tools > Admin Account.
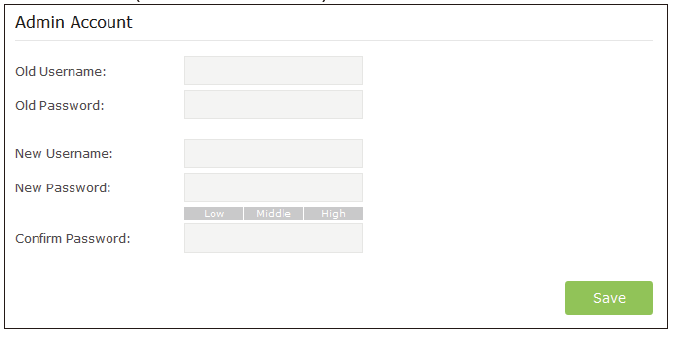
- Enter the old username and password. Then enter the new username and password twice (both case-sensitive) and click Save.
- Use the new username and password for future logins.
System Log
When the extender does not work properly, you can save the system log and send it to our technical support for troubleshooting.
- Visit http://tplinkrepeater.net, and log in with the username and password you set for the extender.
- Go to Settings > System Tools > System Log.
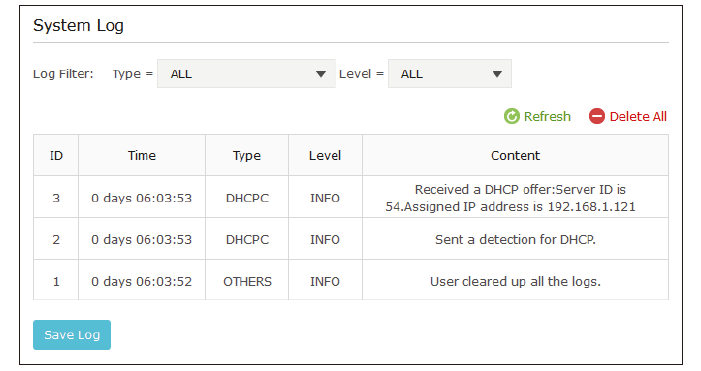
To Save the system log in local:
- Choose the type and level of the system log as needed.
- Click Save Log to save the system logs to local.
Troubleshooting
Common issues with the TL-WA860RE include weak signal strength, dropped connections, and failure to connect to the router. To resolve these issues, ensure that the range extender is placed in an optimal location with minimal interference from other devices.
If you encounter connection drops, restart both the range extender and your router. For weak signal strength, adjust the position of the range extender or consider using it in Access Point mode for a more stable connection.
Always refer to the user manual for specific troubleshooting steps and ensure all firmware is up-to-date.
Pros & Cons
Pros:
- Easy to set up using WPS or web-based interface
- Compact design fits neatly into any power outlet
- Supports both Range Extender and Access Point modes
- Affordable pricing
- Includes an Ethernet port for wired connections
Cons:
- Limited to 2.4 GHz frequency band
- No support for 5 GHz band or dual-band functionality
- Single Ethernet port may be limiting for some users
- May not be as effective in very large homes or areas with significant interference
Customer Reviews
Customers have generally praised the TP-Link TL-WA860RE for its ease of setup and effective performance in extending Wi-Fi coverage. Many users have noted that it significantly improves internet speeds in areas previously affected by dead zones.
However, some users have reported issues with signal stability over long distances and the lack of dual-band support. Despite these minor drawbacks, the TL-WA860RE remains a popular choice due to its reliability and value for money.
Faqs
What is the maximum wireless speed of the TP-Link TL-WA860RE?
How do I set up the TP-Link TL-WA860RE using WPS?
Can I use the TP-Link TL-WA860RE as an Access Point?
Why is my Wi-Fi signal weak after setting up the TL-WA860RE?
How many Ethernet ports does the TP-Link TL-WA860RE have?
Does the TP-Link TL-WA860RE support dual-band frequencies?
How do I update the firmware of my TP-Link TL-WA860RE?
Can I use multiple TP-Link TL-WA860RE extenders in the same network?
What are some common issues with the TP-Link TL-WA860RE and how can I troubleshoot them?
Is the TP-Link TL-WA860RE suitable for large homes or offices?
More tp-link manuals
- Pairing: Tp-Link Kasa Smart Wi-Fi Plug HS100 User Manual
- Tp-Link Kasa Smart Wi-Fi Dimmer Switch KS220M User Guide
- How to Use: Tp-Link Better Energy Wi-Fi Range Extender User Manual
- Tp-Link 4G LTE Router TL-MR105 User Guide
- Setup: Tp-Link TL-WN725N 150Mbps Wireless N Nano USB Adapter User Manual
- & Features: Tp-Link Kasa Smart Wi-Fi Power Strip KP303 User Manual
Leave a Comment