Vevor Smart Dimmer Switch WS-USR-D User Manual
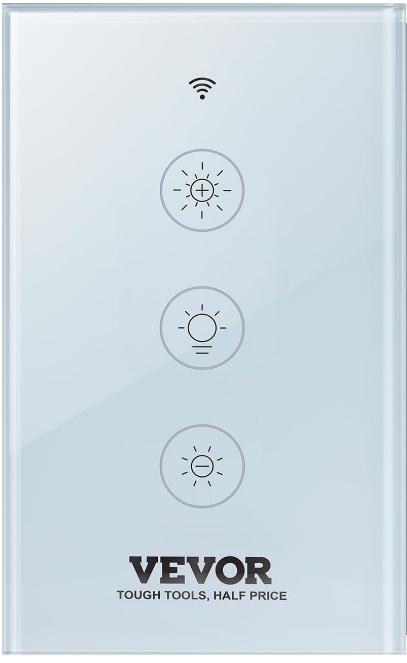
Content
Introduction
This new designed glass panel wireless touch smart switch is designed with WiFi+RF to replace traditional switches with a variety of ways to control.Now one new smart feature as new easier pairing method with Bluetooth supported is added into the Smart Life/Tuya App, together with the backlight on/off and relay status. And its scratch-resistant glass panel is suitable for different decoration styles with its best value. Note: Button sound on and off: no button operations before operations begin within 6 seconds . Then press the switch button for 4 times and long press for the fourth time(20s) until the switch beep sounds as Di-Di for 2 times for successful operation.
Priced at roughly $29.99, it integrates contemporary technology with intuitive features, rendering it an exceptional enhancement to smart home configurations.
SAFETY INFORMATION
Risk of Electric Shock: Electricity can cause personal injury and property damage if handled improperly.If you are not sure about any part of these instructions,please seek professional assistance from a qualified electrician
LIST OF ACCESSORIES
- Products * 1(Single package*1;Two packages*2)
- Instruction manual*1
- Screw(M4-35mm )*2(Single package*2;Two packages*4)
Technical Parameters
- Model:WS-USR-D
- Working voltage: 100-250V AC, 50Hz/60Hz
- Max. total current: 2A
- Max. Load Power: 220W(110V)
- Wireless type: WIFI2.4G+RF433MHz
- Working temperature: 0℃~40℃
- Support system: Android/iOS
Warnings: Turn off the power at the circuit breaker and test that power is off before wiring.
Description
The Vevor Smart Dimmer Switch WS-USR-D features a contemporary and small design that integrates effortlessly into any home aesthetic. The switch incorporates a touch-sensitive interface for manual modifications and an LED indicator for status alerts. It is engineered for energy efficiency, assisting consumers in reducing their electricity expenses by optimizing light consumption.
This intelligent dimmer switch incorporates scheduling functionalities, enabling users to establish personalized lighting scenarios and timetables. This switch provides the flexibility and control necessary for creating a comfortable environment or ensuring enough lighting in your absence.
Vevor Smart Dimmer Switch WS-USR-D Installation
- Make sure that the power at the circuit breaker is off before wiring.
- A neutral Wire is required. Confirm the wall box contains a Neutral Wire(typically white). If the wall box doesn’t have a Neutral Wire, please try another location at your home or call a professional electrician to install the switch.
- The wire colors indicated in this manual are the usual colors and may differ in some houses.
- Ensure the wire conductors are securely fastened to each wire.
- Ensure the Wi-Fi signal is steady and normally working before wiring.
- If you don’t have any wiring experience, please call a professional electrician.
Step 1:
- Turn off the circuit breaker and use the electrical tester to test the power.
Ensure the circuit breaker is off before wiring.

Attention: Please disconnect the power supply before installing or removing the device for avoiding irreversible damage on the device from the electric current or some unpredictable problems such as lamp flashing.
Step 2:
Remove the old switch.
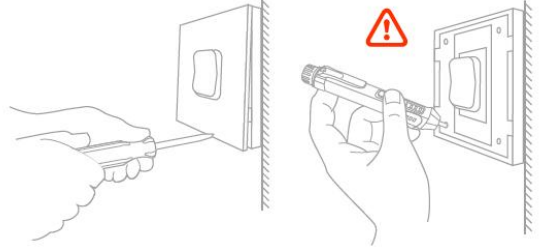
Step 3:
- Remove the switch and pull it away from the wall. Identify Line/Load Wire(Note:The color of your wire may be different from the color shown on the manual.)
Verify power is off
- We recommend you remove the faceplate from the old switch and use an electrical tester to test all wires connected to the switch to ensure there is no voltage in the circuit.
- You may need to turn off more than one circuit breaker.
Step 4:
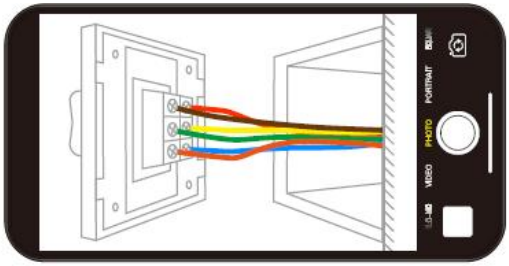
- Take pictures of the wiring.
Follow the wiring diagram to connect the switch wires to the wires in the wall box with the wire conductors.
Step 5:
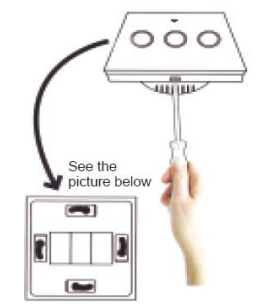
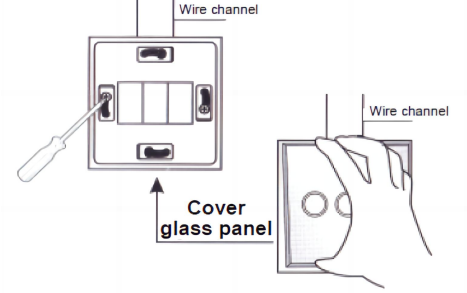
- Remove the panel with a screwdriver.
Please don’t install with electricity power on.
Step 6:
- Prepare to install wiring.
- Live wire connects “ L ” terminal.
- Neutral wire connects “ N ” terminal.
- 1 Gang connects “L1” terminal
1 Gang L1 and N line.

Step 7:
- Put the switch into switch box in the wall.
- Mount the two side screws.
- Install the glass panel (install from up above).
Finish installation.
ADD DEVICES
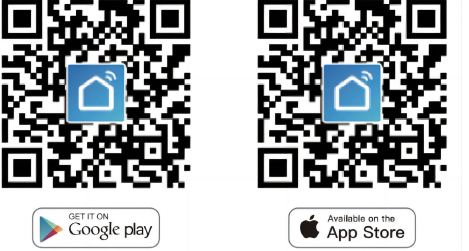
- Download Smart Life App.
Please scan the QR code or download Smart Life on App store. - Registration or Log in.
- Download “Smart Life”Application.
- Enter the Register/Login interface;tap “Register” to create an account by entering your phone number to get verification code and “Set password”.Choose “Log in” if you already have a Smart Life account.
Configure the APP to the switch.
Preparation: Ensure the switch has been connected with electricity;ensure your phone has been connected to Wi-Fi and is able to connect to the Internet.
Note:
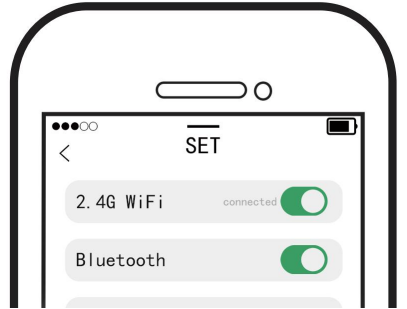
- The switch only supports 2.4G network.If you have connected 5G network,please disconnect 5G network firstly and connect 2.4G network.
- Wi-Fi link method: (two matching methods).
Method one
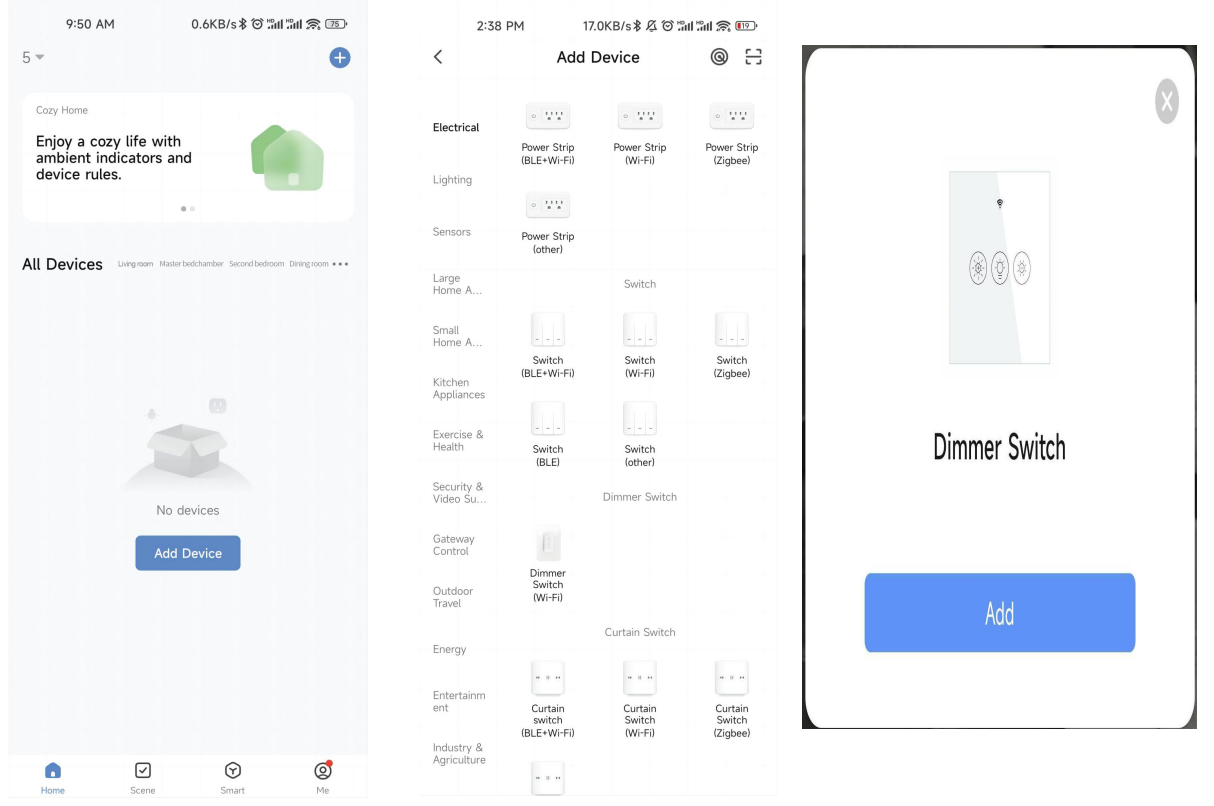
Please connect the device according to the configuration process.
Method two
Make sure your phone is connected to Wi-Fi and Bluetooth.
Reset: Press the switch button for 6 times,and hold on the 6th time,then release until you hear Di-Di-Di(3times),and the blue indicator on the switch will flash fast after 3 seconds.Reset/re-pair is successful.
Open the Smart Life App, click "+" in the upper right corner, find the device to be added in the device discovery location, and click "Add".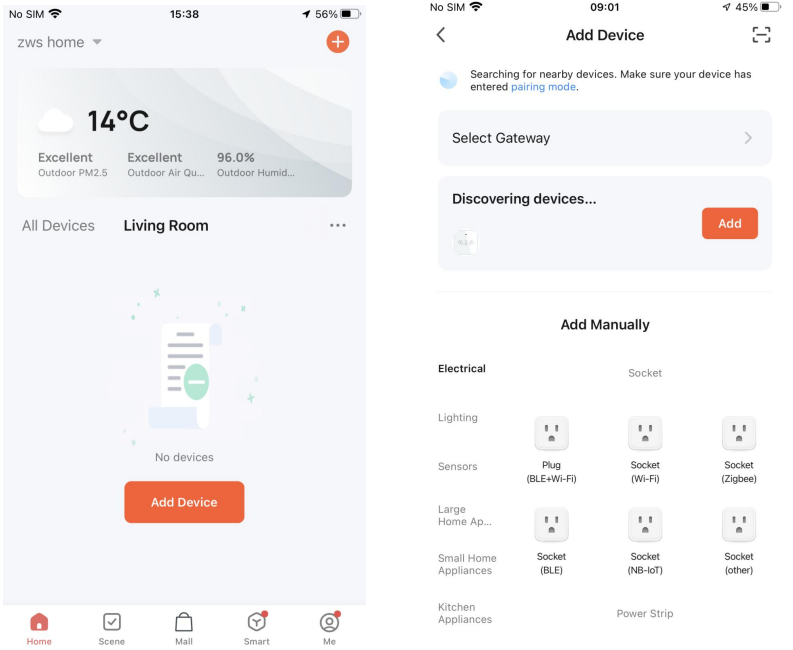
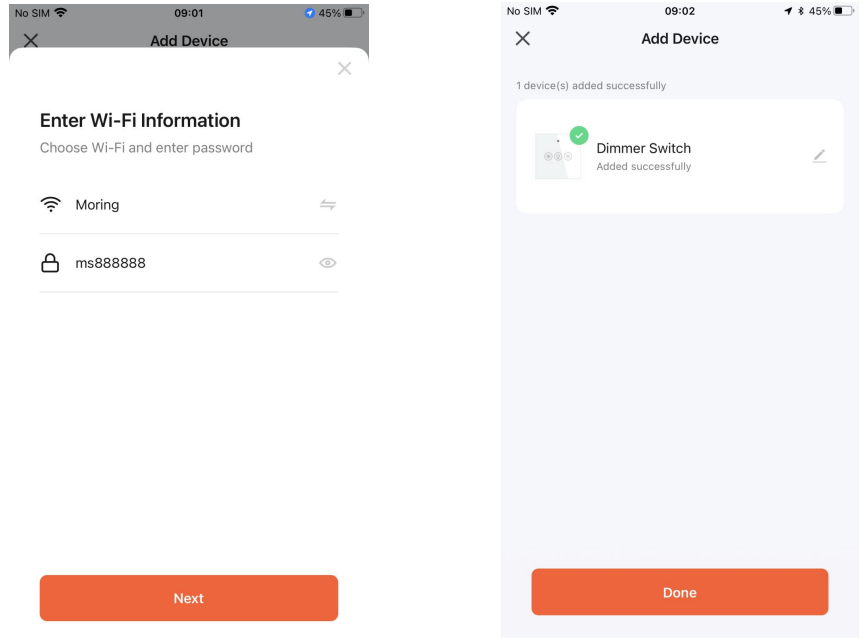
Enter the Wi-Fi password, click "Next", and wait for the connection to complete.Add the device successfully,you can edit the name of the device to enter the device page by click “Next”
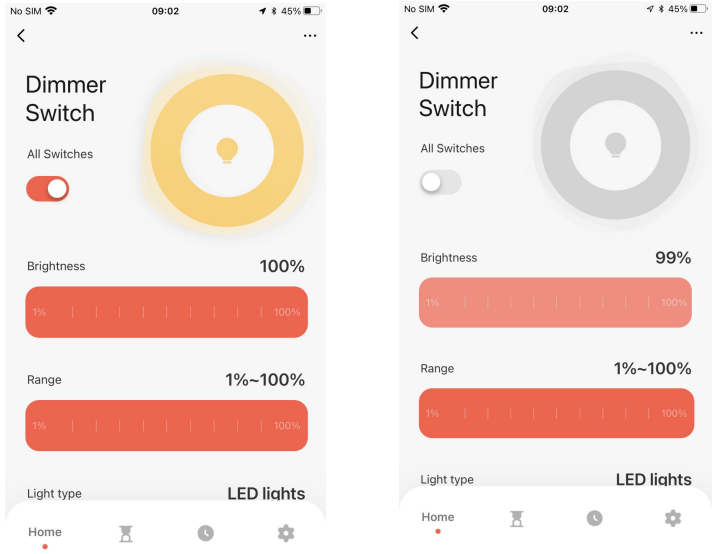
Click“Done”to enter the device page to enjoy your smart life with home automation
How to reset/re-pair Wi-Fi code
Press the switch button for 6 times,and hold on the 6th time,then release until you hear Di-Di-Di(3 times),and the blue indicator on the switch will flash fast after 3 seconds.Reset/re-pair is successful.
Enter Smart Life Skill in Alexa APP
- Complete product networking configuration in the App
Complete the device's networking configuration according to the prompts in the App.
Note: In the App, change the name of the device to an easily identifiable name such as Alexa; names are usually in English, such as “bed light”. - How to connect Smart Device to Amazon Alexa.
- Launch Smart Life App, sign into your account and make sure Smart Device is on the device list.
- Minimize Smart Life App, then launch the Alexa App and sign in your Alexa account and make sure you have at least one Alexa smart speaker-controlled device installed like Echo Dot, etc.
In the upper left corner of Home page, press the
 button to show the APP Menu. Then select
 in the menu
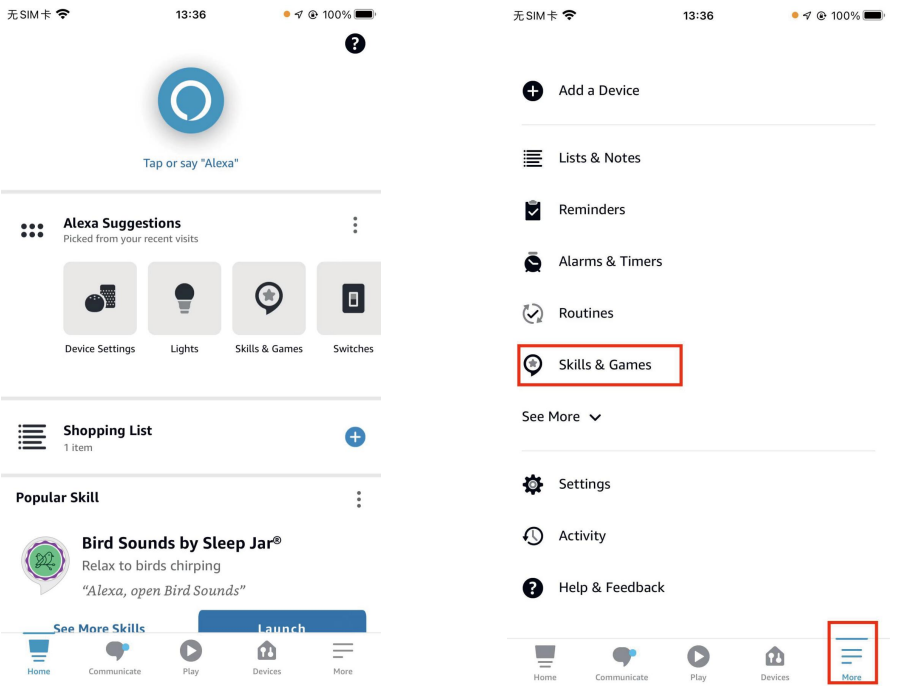
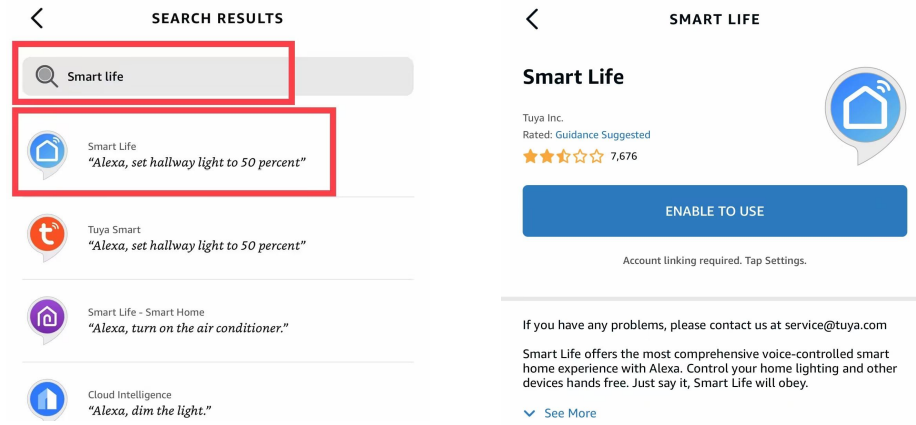
Type in “ Smart Life " in the search and press the search button next to it

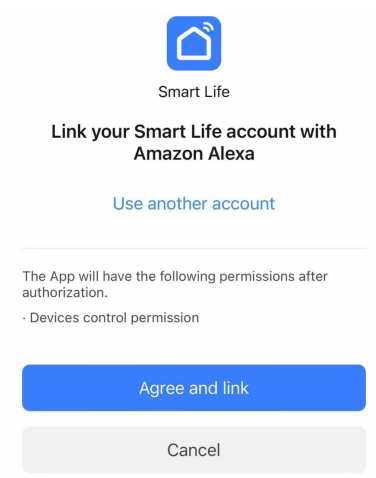
Enable Smart Life Smart Skill then sign in your Smart Life account to complete your account setup.
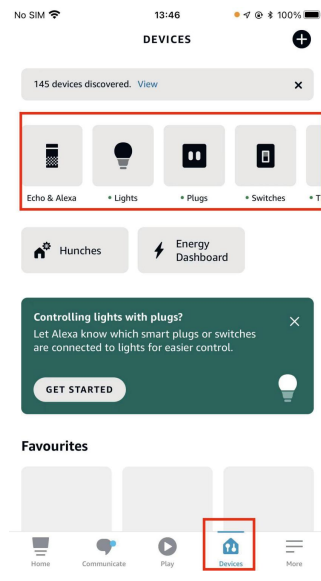
Once your account has been successfully linked, ask Alexa to discover devices. After a 20-second searching, Alexa will show all the available devices.
In the Smart Home page, you can group your devices in different categories. Your SMART LIFE APP has now been paired with Alexa. Now you can control your Smart Device through Alexa.
HOW TO CONNECT SMART DEVICE TO GOOGLE HOME
- Launch the Google Home App and make sure Google Home speaker is installed. If not, please follow Google Home speaker installation instruction to complete the installation.
Once Google Home is installed, in the upper left corner of App Home page, Pressing
 button to show App menu. Then press“Home Control”in the menu.
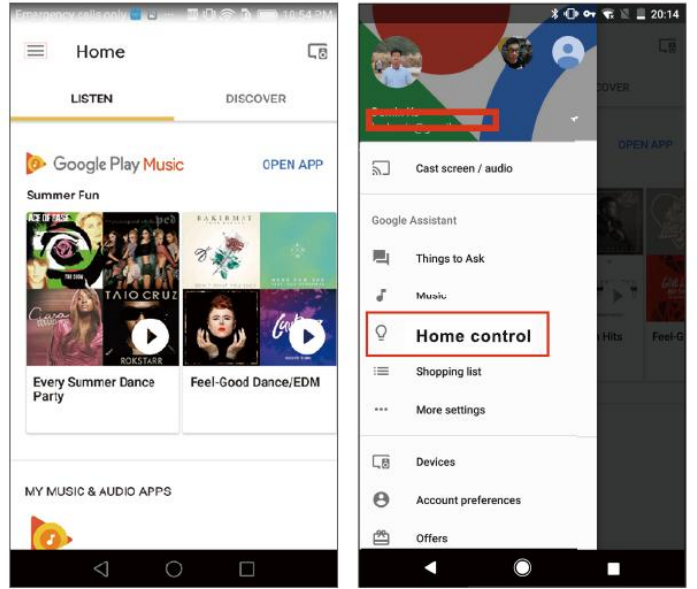
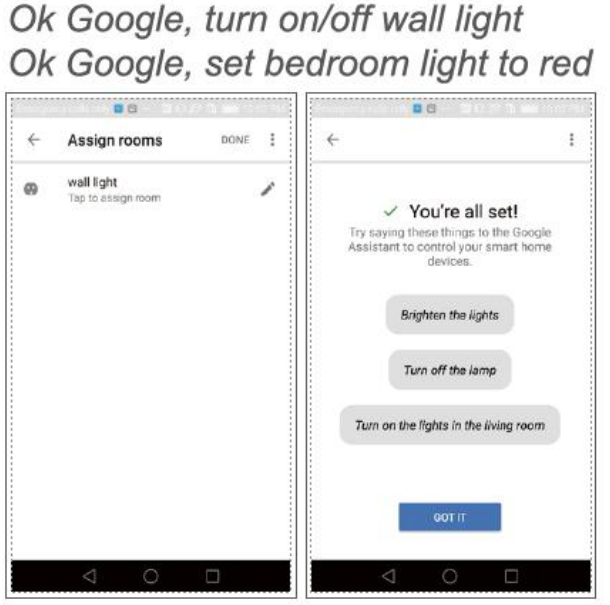
- After successfully linking your account, in the Google Home App you can see all your smart devices from your SMART LIFE App account. You can assign rooms for each device.
Now you can use Google Home to control your smart device, you can say like.
Setup Guide
To set up the Vevor Smart Dimmer Switch WS-USR-D,
- Commence by deactivating the electricity to the circuit at your primary electrical panel.
- Subsequently, detach the old switch and attach the wires to the appropriate terminals on the new switch.
- Verify that the neutral wire is connected, as it is essential for optimal functionality.
- After installation, download and install the Vevor Smart Home application on your smartphone.
- Adhere to the in-application directives to connect the switch to your Wi-Fi network. You may also combine it with your smart speaker or other smart devices for voice control.
Vevor Smart Dimmer Switch WS-USR-D Troubleshooting
If you encounter issues with the dimmer switch,
- Check if the power is turned off during installation.
- Ensure all wires are securely connected and that the neutral wire is present.
For app-related issues,
- Restart the switch and your router, then try reconnecting through the app.
In case of flickering lights,
- Check if the bulb type is compatible with the switch.
For connectivity problems,
- Ensure your Wi-Fi network is stable and that the switch is within range of your router.
Warranty
Product quality problems occur within 24 months from the date of receipt, please prepare the product and the packaging, applying for after-sales maintenance in the site or store where you purchase We will provide you with a two-year worry-free after-sales service.
Pros & Cons
Pros
- Simple installation with detailed instructions
- Compatible with numerous smart home systems
- ENERGY STAR certified for energy efficiency.
- Capabilities for scheduling and scene establishment
- Competitive pricing relative to alternative smart dimmers
Cons
- Installation necessitates a neutral wire.
- May necessitate more configuration for voice control integration
- Several users indicate sporadic connectivity problems.
- Restricted compatibility with some bulb types
Customer Reviews
Customers have largely commended the Vevor Smart Dimmer Switch WS-USR-D for its ease of use and easy connection with current smart home systems. A multitude of consumers like the energy-efficient functionalities and the capacity to manage their lighting from a distance. Nevertheless, some users have indicated sporadic connectivity problems and challenges with specific bulb kinds.
Common complaints
Include the requirement of a neutral wire for installation, which might be an issue for older homes without this wiring layout. Notwithstanding these little concerns, the general opinion indicates that this smart dimmer switch is a dependable and effective enhancement to any smart home configuration.
Faqs
What smart home systems is the Dimmer Switch compatible with?
Does the Vevor Smart Dimmer require a neutral wire for installation?
Can I use the Smart Dimmer Switch WS-USR-D with any type of light bulb?
How do I set up scheduling and scenes on the Dimmer Switch?
Is the Vevor Smart WS-USR-D energy-efficient?
Can I control the WS-USR-D remotely?
What should I do if I encounter connectivity issues with the Vevor Dimmer?
Is the Vevor Dimmer easy to install?
Can I use voice commands to control the Smart Dimmer Switch ?
What kind of security features does the Smart WS-USR-D have?
Leave a Comment
