
Setup: Beurer Compression Leg Therapy FM-150 Pro Owner Manual
Content
Beurer Compression Leg Therapy FM-150 Pro: Complete Product Manual and Guide
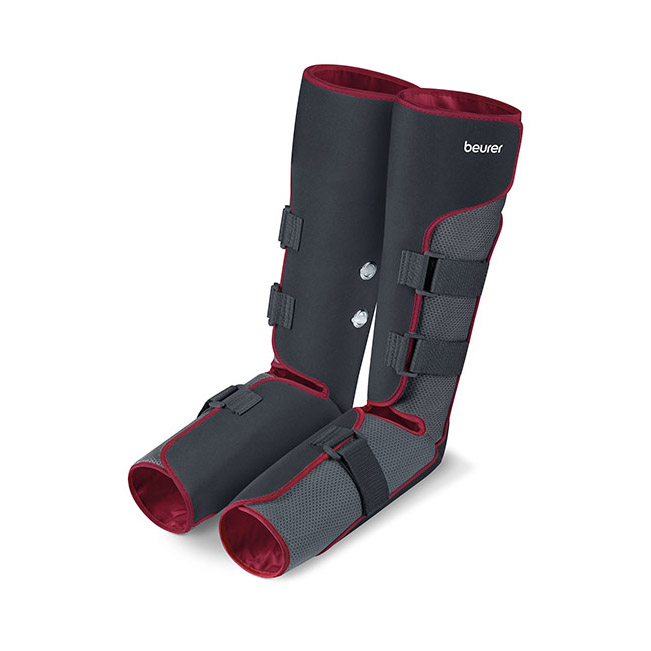
Introduction to Beurer Compression Leg Therapy FM 150 Pro
The Beurer Compression Leg Therapy FM 150 Pro is a premium leg compression massager designed to enhance venous blood circulation through advanced air pressure technology. This medical-grade device features two adjustable leg cuffs with integrated inflating and deflating air cushions that deliver revitalizing compression massage to the calves, feet, and thighs, alternating between legs for optimal results. Ideal for individuals suffering from tired, heavy, swollen legs, poor circulation, or varicose vein risks, it reduces swelling, alleviates muscle tension, and promotes recovery from sports injuries like bruises or sprains.
Key benefits include continuously adjustable pressure intensity up to 130 mmHg, customizable timer settings (10, 20, or 30 minutes), and easy one-leg-at-a-time operation with automatic alternation, making it perfect for daily home use by office workers, athletes, or those with sedentary lifestyles. Unique selling points are its hook-and-loop fasteners for cuffs fitting 29-53 cm leg sizes, safety STOP button, auto shut-off, and dual power options: 4x AA batteries or mains adapter (100-240V input, 6V DC output). Target audiences include people preventing spider veins, managing edema, or seeking leg compression therapy for better circulation. Priced around $150-$250 depending on retailers, it's widely available online and in medical supply stores with a 3-year warranty. Experience relief from heavy legs with this user-friendly Beurer FM 150 Pro leg massager—start at low intensity and gradually increase for personalized comfort.
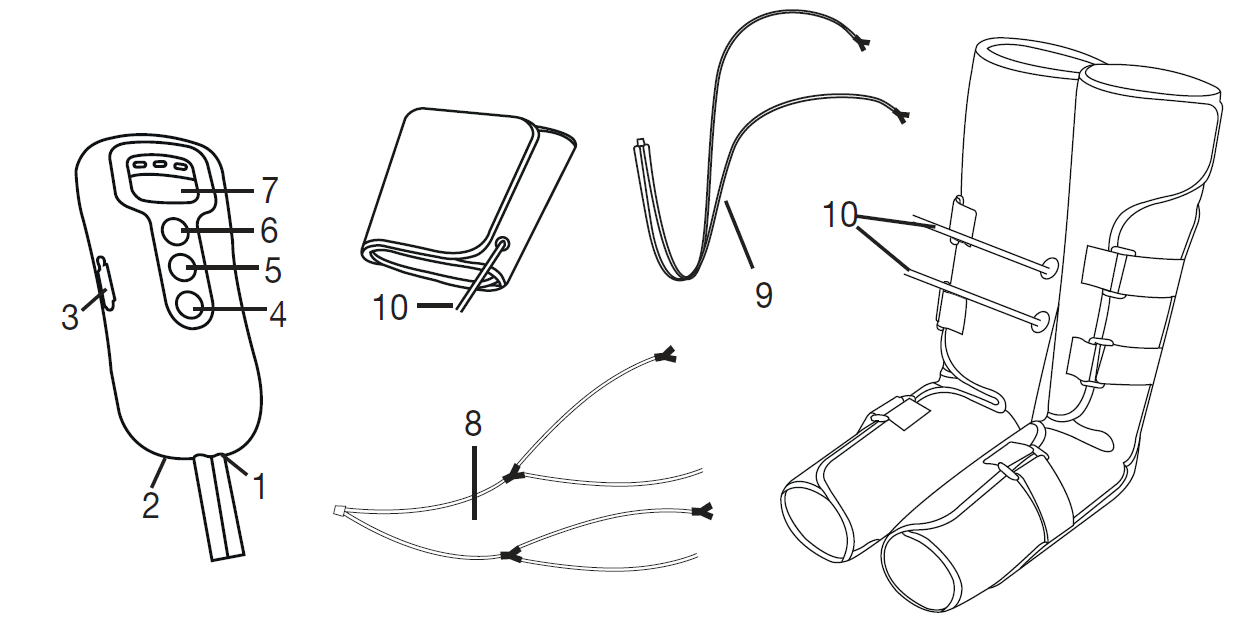
Device Description
- Air inlet (“in”)
- Mains socket
- Air outlet
- ON/OFF button
- Air outlet button
- Stop button*
- Timer button (10/20/30 min)
- Air hoses (white) for supplementary use of the thigh cuffs
- Air hoses (grey) for use of the lower-leg cuffs only
- Connection for air hoses
Technical Specifications
- Cuff Pressure: Max. 120 mmHg (when correctly used, as described in Section 9.1).
- Cuff Size: 29–53 cm
- Timing Time: 10–30 minutes with a deviation of ±10%.
- Voltage Supply for Battery Operation: 6.0 V DC (4 × 1.5 V AA batteries, alkaline type LR06).
- Permissible Operating Conditions: +5°C to +40°C, 15–93% relative humidity (non-condensing), 700–1060 hPa ambient pressure.
- Permissible Storage Conditions: -25°C to +70°C, 0–93% relative humidity (non-condensing), 700–1060 hPa ambient pressure.
- Permissible Transport Conditions: -25°C to +70°C, 0–93% relative humidity (non-condensing), 700–1060 hPa ambient pressure.
- Dimensions:
- Leg Cuff: 61 × 67 × 0.5 cm
- Thigh Cuff: 85 × 23.5 × 0.5 cm
- Hand Switch: 17 × 7.7 × 3 cm
- Total Weight: Approx. 1700 g (without mains part).
Initial Use
- Remove the packaging.
- Remove the grey protection on the hook-and-loop fasteners of the leg and thigh cuffs.
- Check the device, mains part, and cable for damage.
- You can either operate the device with batteries (4 × 1.5 V AA alkaline type LR06) or using the supplied mains part.
Note: You can use the device either with the supplied mains adapter or with batteries. We recommend using the mains adaptor for reasons of sustainability.
Initial Use with Batteries
- Open the battery compartment on the rear of the hand switch.
- Insert four 1.5 V AA (alkaline type LR06) batteries. Make sure that the batteries are inserted the correct way round. See the graphic in the battery compartment. Do not use rechargeable batteries.
- Close the battery compartment on the rear of the hand switch until you see and hear it click into place.
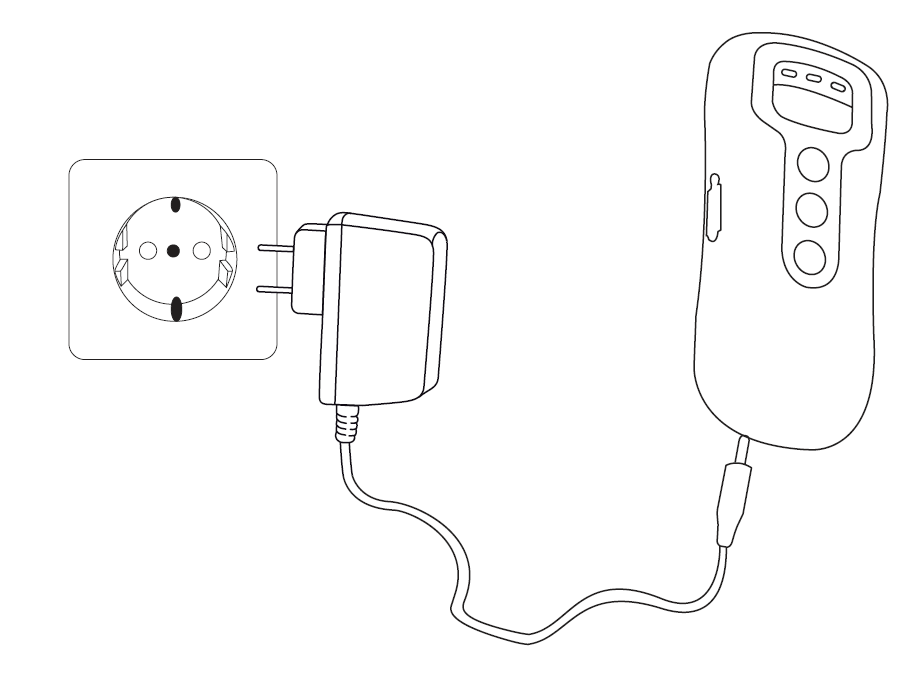
Initial Use with Mains Part
Note: Before using for the first time with the mains part, check that there are no batteries fitted in the hand switch.
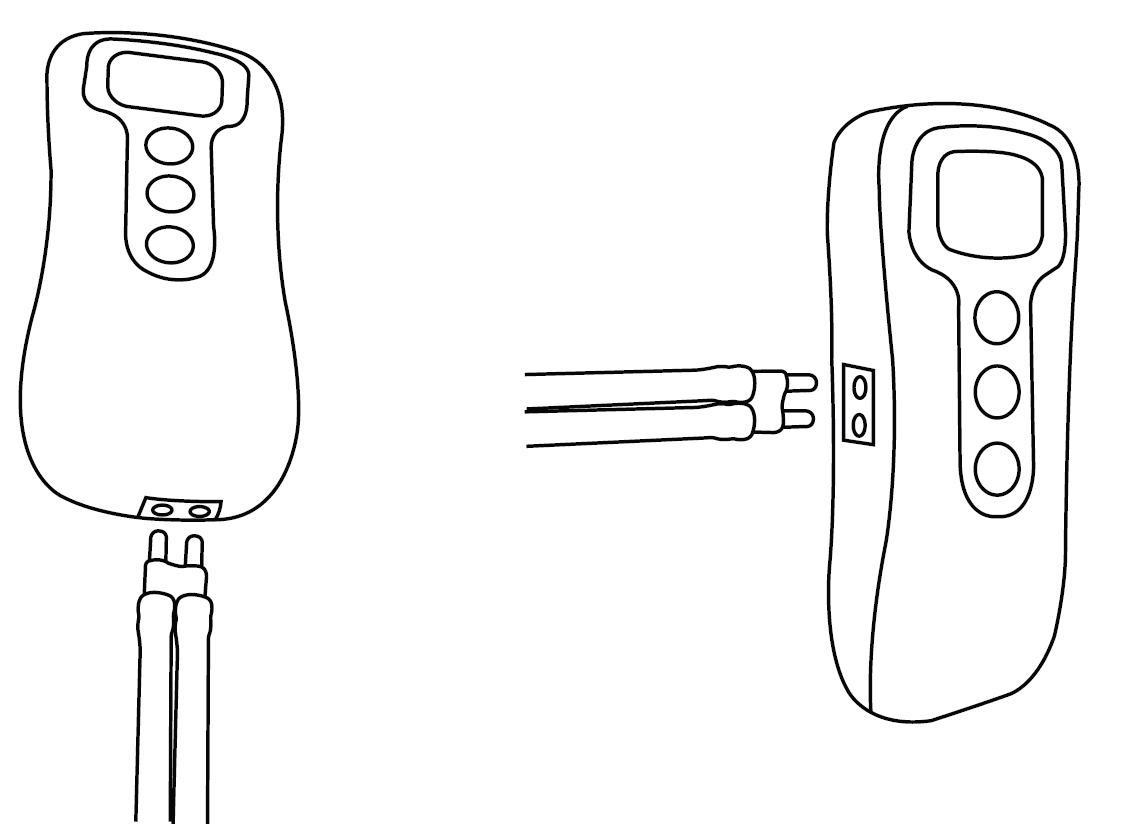
- Connect the mains part to the hand switch as shown.
- Plug the other end of the mains part into a suitable socket.
- The device is now ready for use.
Use
Starting Treatment
- Always follow the instructions in the “Initial Use” section.
- Place the leg and thigh cuffs one at a time securely over your thighs, lower legs and feet as shown; have your legs bare or wear closely fitting clothing (e.g. tights).
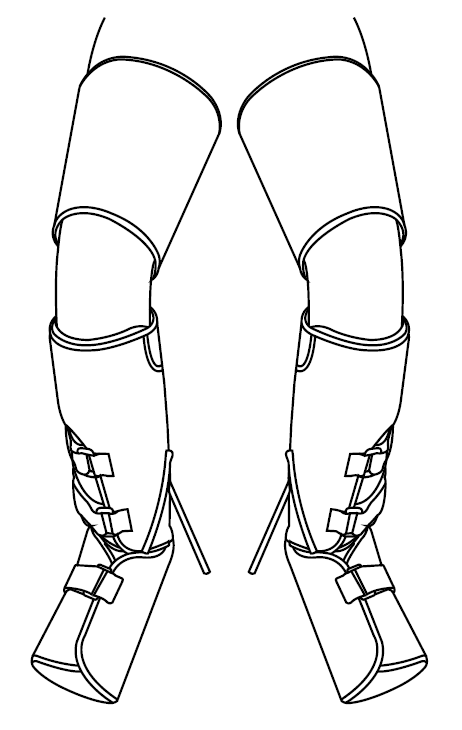
- The cuffs should be fastened so that two fingers can still fit under the cuffs. If the cuffs feel too tight, fasten the cuffs so that you can get your flat hand under them.
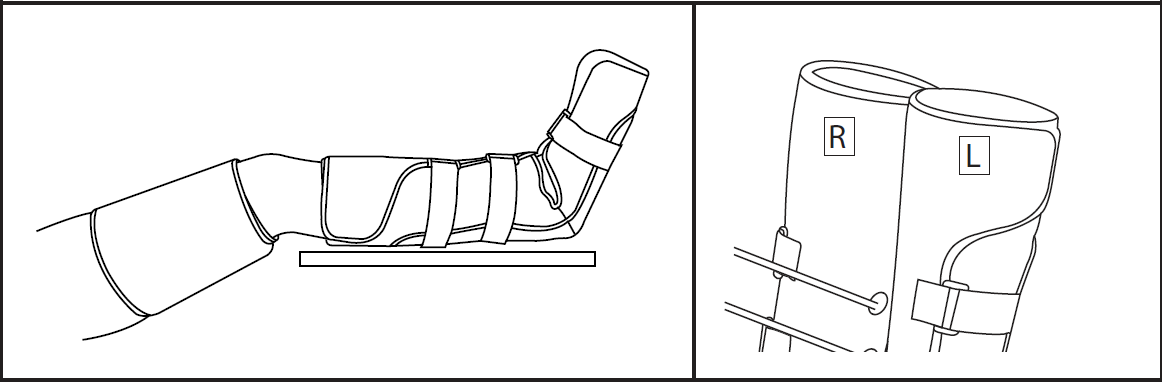
- 3. For best results, your legs should be elevated/slightly bent during the treatment to aid circulation.
- Both the leg and thigh cuffs for the left leg are marked with an “L” on the inside.
- Both the leg and thigh cuffs for the right leg are marked with an “R” on the inside.
Using the Thigh and Lower-Leg Cuffs
- Connect the white air hoses to the cuffs. Ensure the air hoses are securely in place and cannot slip.
- Connect the other end of the air hose to the air inlet (“in”) on the hand switch.
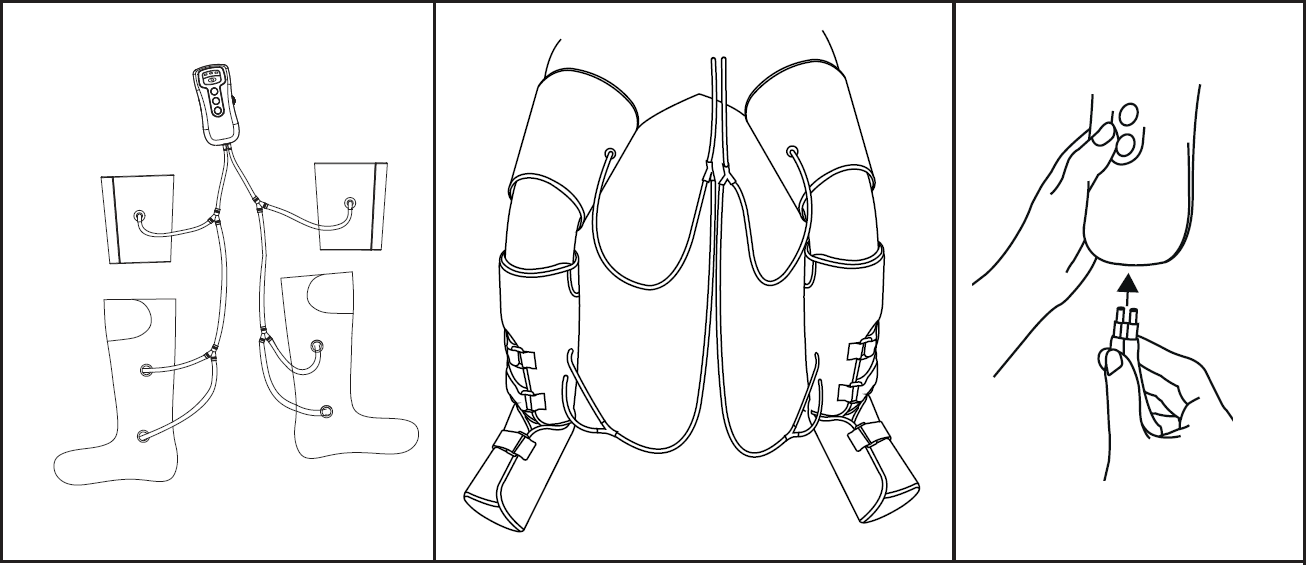
Using the Lower-Leg Cuffs
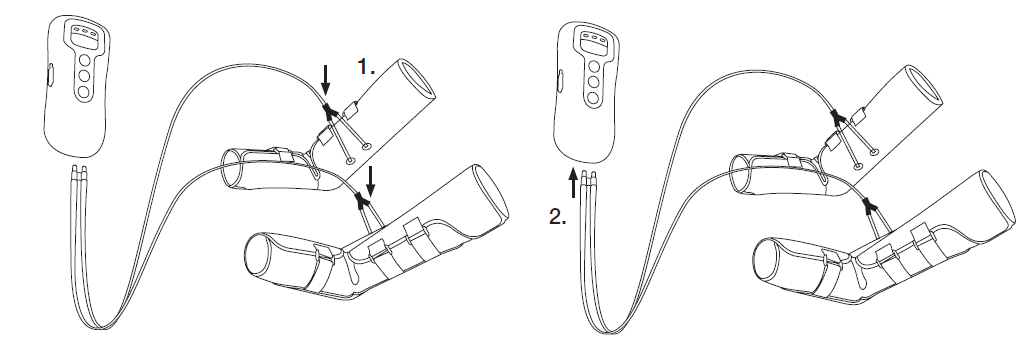
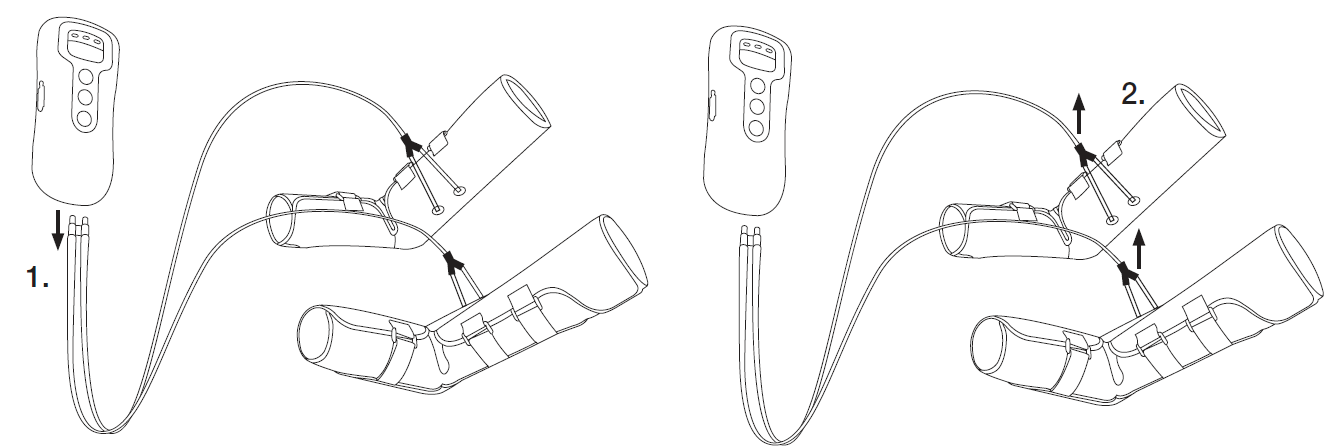
- Connect the grey air hoses to the lower-leg cuffs (1.). Ensure the air hoses are securely in place and cannot slip.
- Connect the other end of the air hose to the air inlet (“in”) on the hand switch (2.).
- Press the ON/OFF button to switch on the device. Once the device is switched on, the 20 minute timer LED lights up.
- Please note that the timer begins to count again when you change the timer setting.
IMPORTANT: We recommend an application time of 20 to 30 minutes. Using the massager for long periods could result in a feeling of numbness in the legs and could cause the device to overheat.
- Press the ON/OFF button to switch on the device. Once the device is switched on, the 20-minute timer LED lights up.
- Please note that the timer begins to count again.
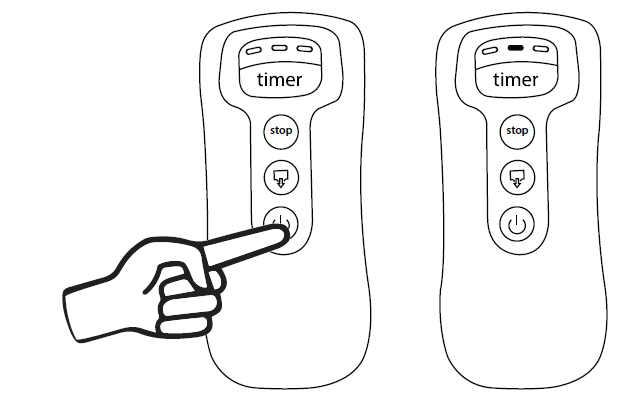
- The intensity is adjusted using the air pressure controller. Start at the lowest level so that you get used to the massage gradually. For best effects, the intensity should be set high, but at a level where it is still comfortable.
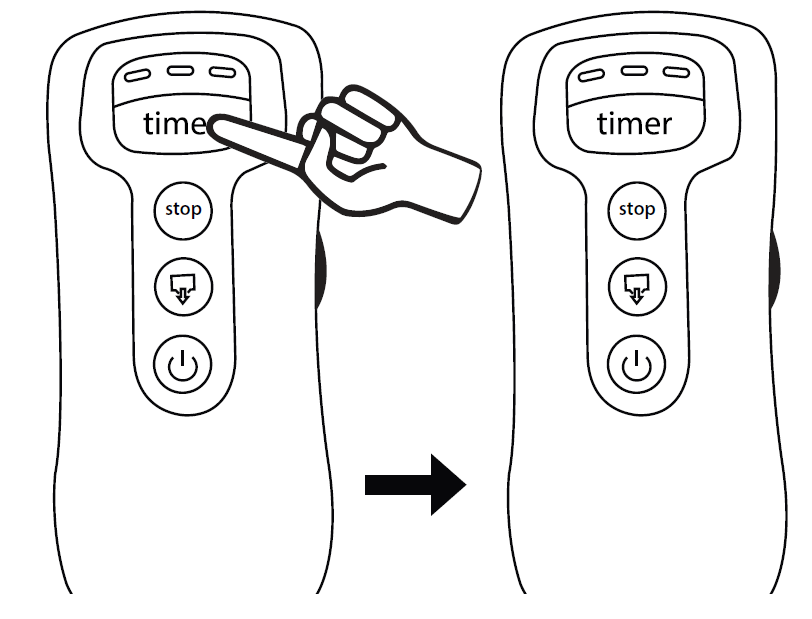
- Press the „timer“ button to switch among three kinds of timing time which are 10 minutes, 20 minutes, and 30 minutes. When starting up, the default is 20 minutes. When the remaining time is 5 minutes, the current time indicator slowly flashes; when the remaining time is 1 minute, the current time indicator quickly flashes.
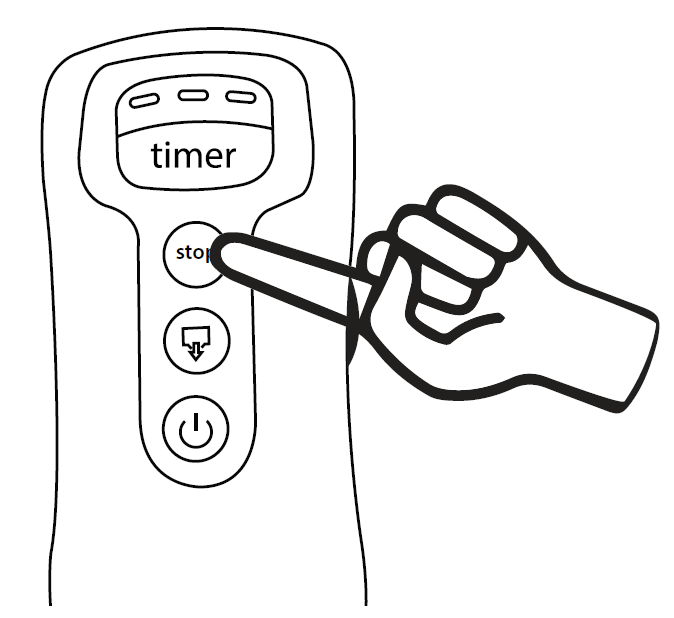
- In the process of using, if you feel the pressure is too much or not comfortable, press the „stop“ button to stop the treatment.
Concluding Treatment
To stop the treatment, you should first switch the device off and then let the air out of the cuffs. Proceed as follows:
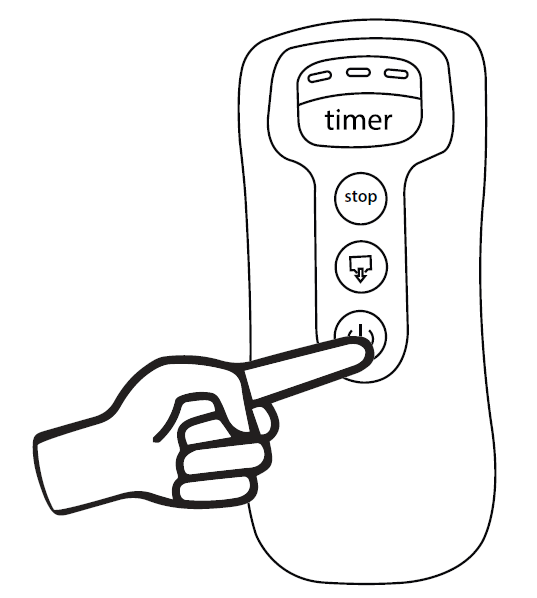
- Switch the device off by pressing the ON/OFF button on the hand switch. The set timer LED goes out. The device is now in standby mode for 30 seconds. During this time, all 3 timer LEDs will be activated.
- Remove the air hose from the hand switch within the 30 second standby mode and insert the air hose into the air outlet on the side of the hand switch and press the air outlet button. All 3 timer LEDs flash at the same time. They go out again when the process has ended.
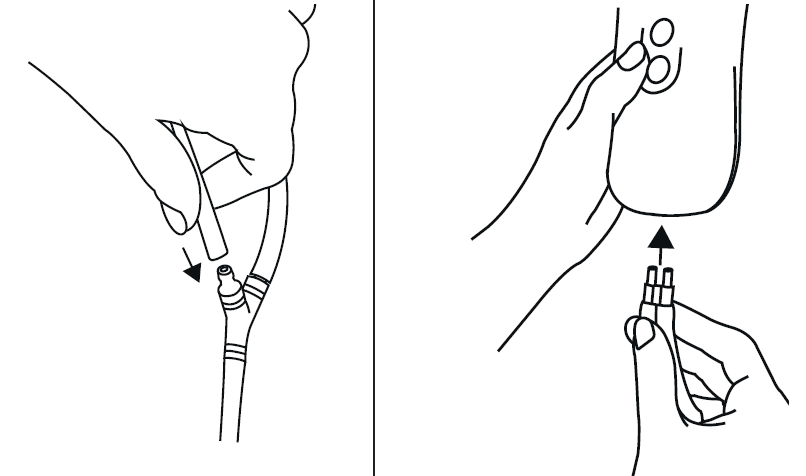
- Undo the hook-and-loop fasteners and take the cuffs off. Remove the white air hoses on the “Y-adapter” from the leg cuffs, but leave the short, white end pieces on the leg cuffs as shown. Also remove the air hose from the adapter that is located directly on the thigh cuffs. If you used the device with the mains part, remove it from the socket and the hand switch.
- Undo the hook-and-loop fasteners and take the cuffs off. Remove the grey air hoses on the “Y-adapter” from the leg cuffs, but leave the short end pieces on the leg cuffs as shown. If you used the device with the mains part, remove it from the socket and the hand switch.
Cleaning and Maintenance
Cleaning the Cuffs
- Always switch the device off before cleaning and remove the air hoses (apart from the short end pieces) from the cuffs and the hand switch.
- Clean the cuffs with a soft, slightly damp cloth. Do not use any chemical or abrasive cleaning agents for cleaning.
- Do not use the cuffs until they are completely dry.
Storage
- If you do not intend to use the device for longer periods, remove the batteries from the hand-held device. Leaking batteries may damage the device.
- Do not make sharp kinks in the air hoses and the cuffs.
- Store the device and accessories in a cool, well-ventilated space in its original packaging.
Troubleshooting Beurer Compression Leg Therapy FM 150 Pro: Common Issues and Fixes
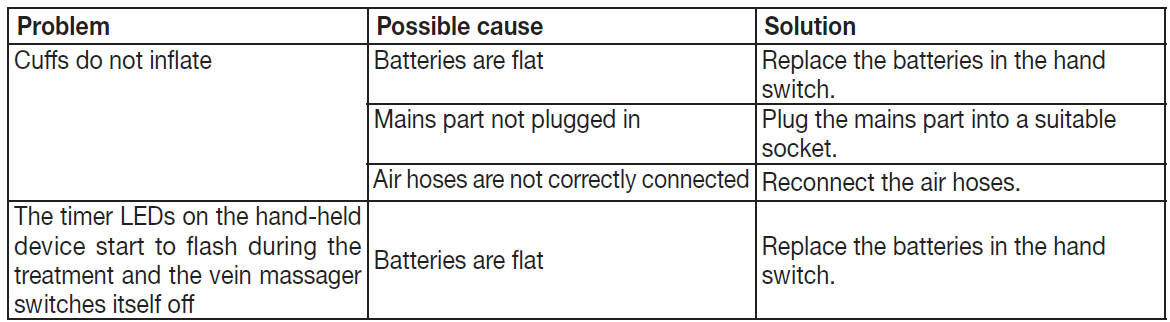
Encountering problems with your Beurer Compression Leg Therapy FM 150 Pro? Most issues stem from improper setup or power supply. If the device doesn't power on, check battery installation (4 x 1.5 V AA alkaline) or mains adapter connection—ensure polarity matches and voltage is 6V DC, 500mA. Cuffs not inflating? Verify the air pressure controller is not at minimum; start low and adjust gradually. Timer not flashing (slow at 5 minutes, fast at 1 minute)? Press the timer button to cycle 10/20/30 minutes—default is 20.
- No massage action: Ensure cuffs are securely fastened with hook-and-loop (29-53 cm fit); clean air cushions if blocked.
- Weak pressure: Increase intensity dial; max 130 mmHg—avoid exceeding for safety.
- Error/Overheating: Use safety STOP or auto shut-off; operate in 5-40°C, non-condensing humidity.
Preventive measures: Store in dry conditions, avoid liquids, and inspect cuffs regularly. Backed by a 3-year warranty and CE mark; contact Beurer support at www.beurer.com or local distributors for replacements. For persistent issues, reference the manual or quick-start video.
Pros and Cons of Beurer Compression Leg Therapy FM 150 Pro
Pros
- Effective circulation boost: Alternating cuff compression reduces swelling and heavy legs, ideal for varicose vein prevention.
- Customizable therapy: Adjustable pressure, timer, and cuff fit (29-53 cm) suit all users.
- User-friendly design: Simple controls, battery/mains power, lightweight (1.4-1.7 kg).
- Great value: At $150-$250, offers medical-grade features vs. pricier salon treatments.
Cons
- One leg at a time: Alternates automatically but not a simultaneous full-leg massage like some competitors.
- Battery dependency: Requires 4 AA batteries for portability; mains preferred for extended use.
- Limited cuff size: Best for standard legs (29-53 cm); may not fit very large thighs.
- Noise during operation: Air pump audible, though tolerable for home use.
Overall, the Beurer FM 150 Pro excels in value for compression leg therapy at home, outperforming basic massagers but trailing high-end multi-zone models.
Customer Reviews: Real User Feedback on Beurer Compression Leg Therapy FM 150 Pro
Users rave about the Beurer Compression Leg Therapy FM 150 Pro, averaging 4.5/5 stars across retailers for its circulation benefits. "Finally relief from swollen legs after long shifts—feels like a spa treatment at home!" praises one nurse (5/5). Athletes note quicker recovery: "Great for post-run calf tension; timer is perfect" (4.5/5). Common praises include easy adjustability and varicose vein prevention[8].
Complaints focus on single-leg alternation: "Wish both legs simultaneous" (3.5/5), and occasional battery drain. Frequently mentioned: Effective for edema but start at low intensity. 85% recommend for daily use, especially vs. cheaper alternatives lacking pressure control. Ideal purchase for chronic leg fatigue.
Faqs
How do I set up the beurer Compression Leg Therapy FM 150 Pro for the first time?
What should I do if the beurer Compression Leg Therapy FM 150 Pro does not inflate properly?
How do I use thigh cuffs with the beurer Compression Leg Therapy FM 150 Pro?
Can the beurer Compression Leg Therapy FM 150 Pro run on batteries or only mains power?
How do I optimize air pressure intensity on beurer Compression Leg Therapy FM 150 Pro?
How often should I clean and maintain the beurer Compression Leg Therapy FM 150 Pro?
Why does beurer Compression Leg Therapy FM 150 Pro massage one leg at a time?
What safety precautions apply when using beurer Compression Leg Therapy FM 150 Pro?
More beurer manuals
- Setup: Beurer Digital TENS/EMS Unit EM 80 User Manual
- Setup: Beurer Digital TENS/EMS Device EM-49 User Manual
- Setup: Beurer Insect Bite Healer BR 90 User Manual
- Setup: Beurer Daylight Therapy Lamp TL-70 User Manual
- Setup: Beurer Insect Bite Healer BR-60 User Manual
- Setup: Beurer Daylight therapy lamp TL 100 User Manual
Leave a Comment